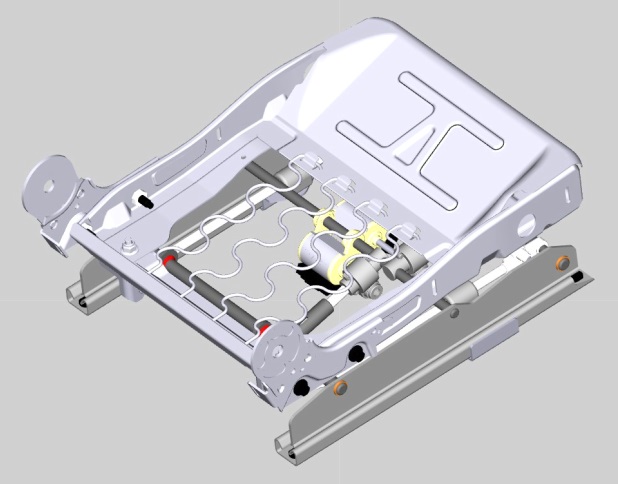
Car Seat
Power/ electric car seats allow users to move the seat position via switches and motors, rather than manual adjustment. Their complexity has increased over time, with modern-day car seats even providing memory positions based on the specific key used to enter the vehicle, to allow seating positions to be automatically adjusted for multiple people.
Power/ electric car seats are fairly simple in theory; motors and mechanical worm gears are used to convert rotational movement to linear. A series of switches are used to move the seat, and sensors are used to determine the position of the seat.
Contents
Exercise 1
Power car seats utilise motors and switches to operate. In this exercise students will program the forward/ backward movement of a car seat with a single motor and two momentary switches.
Tasks
- Start a new flowchart and select ‘No chip’ as the target device.
- Add the Car Seat component to the 3D Panel, found in the 'Simulation -> Scenarios' category. Note; this is a large 3D model, and may take a few seconds to load.
- Add two simulation switches to the 2D panel from the ‘Simulation’ component category and configure them as momentary.
- Create two variables of type ‘Bool’. These are used to determine if the switches are pressed, so name them something meaningful.
- Create a flowchart to move the car seat base forwards and backwards when the appropriate button is pressed.
- You will need to use the ‘Motor1’ macro.
Note
The simulation has been designed to stop the car seat base from extending past the end stops. In the next exercise you will implement the current reading to monitor the seat position and stop the motor movement programmatically.
Working Example
Below you will see a working example to move the car seat backwards and forwards.
What to do next
Modify the program as appropriate to include all 3 axes of movement. You will need 6 switches, and 6 variables. You should end up with a program that allows the user to move the seat backwards and forwards, as well as up and down, at the front and rear.
Exercise 2
For manually controlled power car seats, reaching the mechanical end stops will cause the motor to go into stall conditions, where a large electrical current is consumed. When this occurs the microcontroller program should sense the current spike and stop power to the motor to avoid the motor's coils from burning out.
In exercise 2, you should build on what you have done previously and implement programmatic control over the motors to avoid them burning out.
Tasks
- Open the flowchart from Ex1 and continue working from there.
- Create any new variables you may need to allow you save the current measurements for each motor.
- Create a flowchart that independently allows movement of the three motors.
- Create a variable of type ‘byte’, used to store the value of electrical current and determine if the motor has reached the end stops
- The motor will consume 0A when not in use
- 3A in normal conditions
- 20A in stalled condition when the seat hits the end stops
- Ensure your program stops the motors from moving when the end stops have been reached.
Exercise 3
Previously, we have been only able to determine whether the car seat is at its end stop limits by measuring the stall current of the motor. In exercise 3 you will now look at utilising an encoder to determine the actual position of the car seat. This is essential in creating electric seats with memory functionality.
Tasks
- Continue from the previous exercise, but delete any old code you that is no longer necessary.
- Create new variables to allow you save the encoder values. Note, encoder values could be larger than 255, so use an ‘Unsigned Int’ variable type.
- Use the ‘Encoder’ macros to read the position of the appropriate axes.
- At this point you should also add an LCD screen to the dashboard panel, for testing and debug, and configure it to display the values read from the encoder(s).
- Create a program that allows you to determine the minimum and maximum encoder values for each axis of movement and display them on the screen.
Exercise 4
Previously, we implemented encoders to determine the absolute position of the car seat. This is the first step in being able to create a memory function.
In exercise 4 you will now look at creating a flowchart program that allows you to move the seat manually to a desired position, save that position, and then load from memory when required.
Tasks
- Continue from Ex3
- Add additional switches and variables for ‘Save’ and ‘Load’ functionality.
- Create a program that;
- When the save switch is pressed remembers the encoder position for all motors (use the ‘save’ macro)
- When the load switch is pressed moved from its current position to the saved position (use the ‘load’ macro)
What to do next
Upgrade the system so that you can have multiple save slots. Note, the Save and Load macros offer two save slots (A and B). You will need to create new variables to allow the saving of multiple positions.

