Internal Oscillator
A lot of the devices have an inbuilt oscillator which can be used to reduce the number of devices required to drive the microcontroller.
The device datasheet should detail the type of oscillator available to the device.
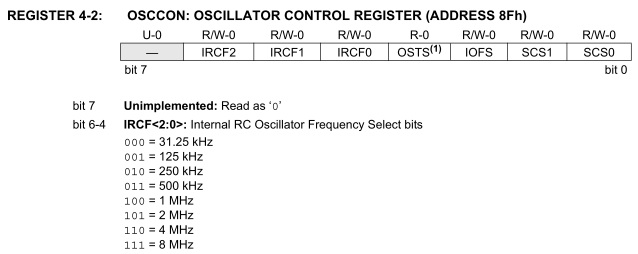
Here we have the datasheet for the PIC16F88 device listing the options available for the internal oscillator.
Using a C code icon at the very top of the Main macro we can specify which speed the microcontroller should start-up with.
To access a register using PIC use the register name in all lower case. e.g. "osccon"
For the PIC 16 bit devices (dsPIC and PIC24) and AVR use the register name in all upper case. e.g. "OSCCON"
Remember to end the line of C code with a semicolon to mark the end of the instruction.
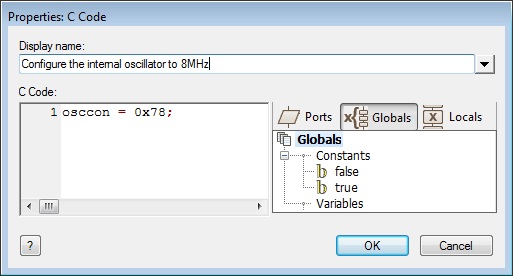
Here is an example to configure the internal oscillator to 8MHz on the PIC16F88.
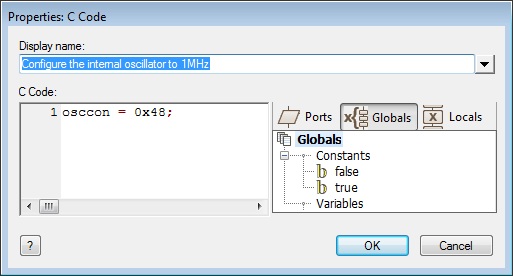
Here is an example to configure the internal oscillator to 1MHz on the PIC16F88.
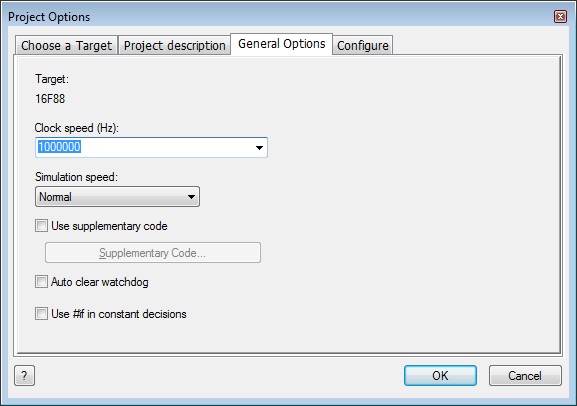
Be sure to set the clock speed in the project options to the same speed to allow your delays and any communications baud rates to be correct.
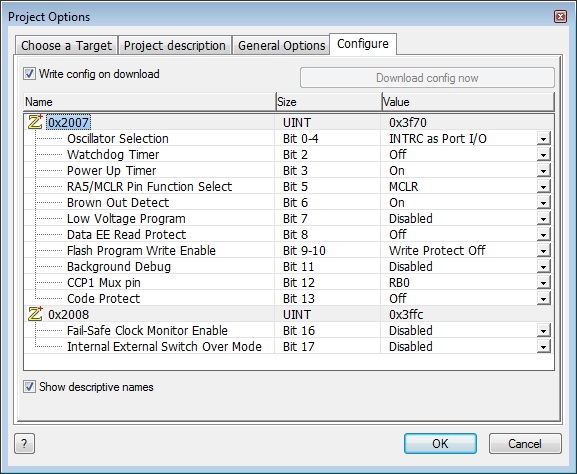
The configuration settings will also need to be edited from the default HS type oscillator to the IntOsc setting.
A One second LED flasher test can be very useful to confirm if your device is actually running at the intended speed.
