|
Introduction to Microcontroller Programming
About PICmicro Chips
Clocking Your PICmicro Devices E-Blocks Flowcode Step By Step
PICmicro Projects
Labs |
Clock Settings<^< The Clock Circuit | Course Index | Clock Confusion >^> On your hardware you will need to make sure that you have connected the clock circuit you want to the microcontroller. For the first labs we will use the RC method of clocking the PICmicro microcontroller. On the Multiprogrammer make sure SW2 is in the RC position. Make sure that SW1 is in the SLOW position. This will clock your PICmicro device at around 100Hz: this is very slow but it will allow you to see each step in your program. You now need to make the appropriate settings in Flowcode for the program to work. When Flowcode downloads your program to the PICmicro chip it will change the internal clock settings and circuitry to mirror the external clock circuit you have placed on the Multiprogrammer board. To do this select Build > Project Options... from the Flowcode menu and you will see this screen:  If your target is not '16F1937' then click on the 'Choose a Target' tab. You should then see this screen:  Click on the Configure tab. This screen allows you to choose between an external RC oscillation system, or a crystal oscillation system. Choose RC (EXTRC) and disable the Watchdog timer (don't worry about what this is for now). You should have a screen that looks like: 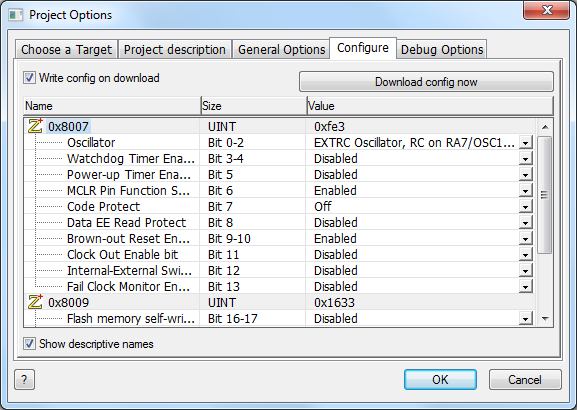 Select OK. If you are an experienced user then you may be interested in changing some of the advanced settings on the chip. This can all be done from the screen shown above. <^< The Clock Circuit | Course index | Clock Confusion >^> |